
White Chocolate Skulls with Berry Coulis
I adore Halloween. I think it’s because Halloween is the only holiday where my creative side really comes out. I love coming up with a creative costume, and I especially love pumpkin carving. In fact, Eric and I decorated and carved six pumpkins the first year we were married! My all time favorite part of Halloween, though, is creating spooky, gruesome and delicious foods. It’s just not Halloween for me without creepy (and sometimes disgusting) looking treats.
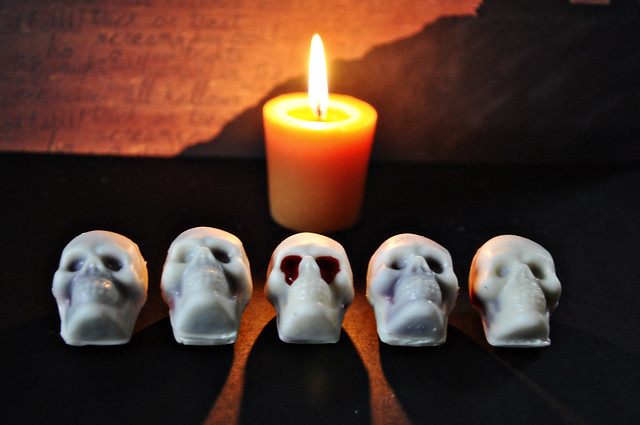
My initial thought for these was to make a hollow skull and then fill it with a red-tinted mousse. That didn’t seem creepy enough, though, so I spent a little more time considering my options when the most wonderful idea popped into my head. When it comes to candy, I can’t think of anything more gruesome than a filled candy that oozes blood when bitten into. Raspberry purée seemed a likely choice for the filling, but, having made it before, I was worried that the color would be too light. I also knew blackberry purée would be too dark. Then it occurred to me that the combination of the two could work. The resulting color was absolutely perfect, as was the flavor. The tartness of the berries balances well with the sweetness of the candy coating. Overall, I couldn’t be happier with how these turned out. It took a couple of tries to get them exactly how I envisioned, but it was definitely worth it to have such a scary looking end result.
- 6 ounces blackberries
- 6 ounces raspberries
- 2 tablespoons sugar
- Splash Chambord liqueur
- White Candy Melts
Special tools: 3D skull candy mold, small paintbrush
- 1
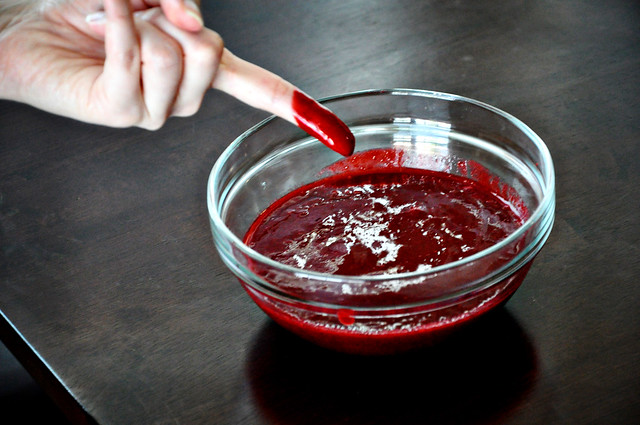
Combine the blackberries, raspberries, sugar and Chambord in a blender or food processor. Using a fine mesh strainer, strain purée into a medium bowl and set aside.
- 2
In a small bowl, melt about ¼ cup of Candy Melts according to package directions. Drop a small amount into each cavity. Using the paintbrush, paint up the sides of the mold. You want the mold to be hollow, but take care not to make your candy coating too thin. Hold the mold up to the light. If any light passes through, your chocolate needs to be thicker.
- 3
Once each cavity is coated with chocolate, refrigerate for 5 minutes. Remove mold from refrigerator. Fill each cavity ¾ full with the berry coulis and set aside.
Melt another ¼ cup of Candy Melts. If you had any leftover from earlier, they can be remelted. Very carefully drizzle a small amount over each cavity to seal it. You want the melted Candy Melts to land lightly on top of the coulis so that it doesn’t overflow.
- 4
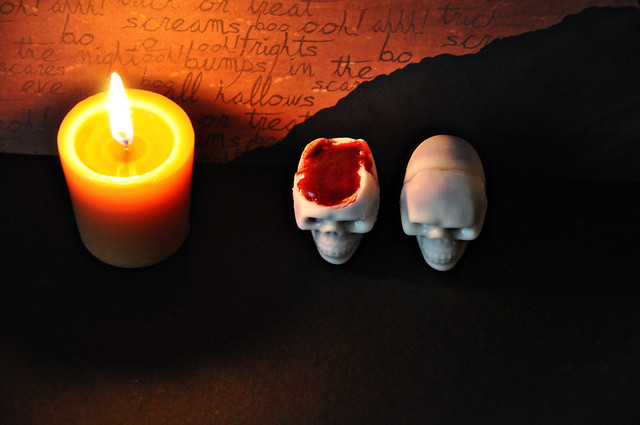
Once each cavity is covered, use a metal spatula to level off the mold. Refrigerate for 10 minutes. After chilling, remove candy by turning mold upside down over a layer of paper towels and gently tapping. You will have skull backs and fronts. To make the 3D skull, place a dab of melted Candy Melts in the center of one piece and gently press the two pieces together.
- 5
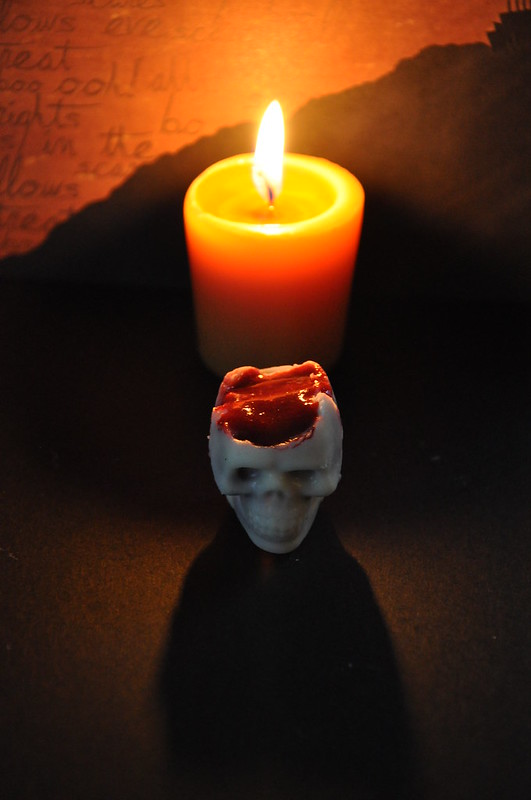
For an especially gruesome appearance, carefully cut around the top of the skull to remove a piece. Add more coulis on top to cover up the seam and give the skull a bleeding effect.


These are kick-ass awesome!
Thanks, Annie! That really means a lot to me! 🙂
Yummy and gross all at the same time. 🙂 I love it.
Amazing!! I'd never have thought of the fruit puree for bloody ickiness, but my gosh, it's perfect! I have more Halloween ideas–one including "blood." Now you have me thinking…
Spooktacular!
Thanks, Abby! That's exactly what I was going for. 🙂
Elle, I'm glad you like the "blood." I didn't know how it would work out, but I'm so glad it's the first thing I tried.
Yay for Halloween and gruesome goodies!
Oh wow! These are fabulously awesome. I love how clever and creepy they look, but I'm sure they also taste delicious.
Yuck/Yum! Those are really gross (and I mean that in the best possible way)! 🙂
Awesome job.
LOVE them! I need to make them soon so I can use them for a Halloween party. Do these need to stay in the fridge, or can I just store them in a container in my pantry for the next couple of weeks? Thanks for the great idea!
I kept mine in the refrigerator overnight. I wouldn’t recommend storing them there for too long because the chocolate could start to condensate.